Recipe: Black Forest Cake for Easter

Makes: 6-inch cake

Time required: 2 hours

Difficulty: ★★☆☆☆

Inspiration:

Easter has always been one of my favourite holidays growing up – treating yourself to a few Cadbury creme eggs and Lindt Easter bunnies approaching Easter and then buying so many more chocolates at half-price come Easter Monday!! However since moving to Hong Kong it has been much more difficult to find Easter chocolates … my local supermarkets sell a few Easter teddies or headbands but Easter eggs are much harder to find. So I was very excited last week when I checked Marks & Spencer and found they have a whole section of different sized chocolate bunnies and eggs.

With the past weekend being my last chance to bake before Easter (as I will be travelling the next few weeks) I wanted to make a fun/playful cake using the Easter eggs as decorations. I decided to make a black forest cake as I’m still dreaming about the amazing one I had at L’Eto during my London visit several months back.

The components for this cake are:

  • rich, moist chocolate cake
  • cherry sauce
  • Chantilly cream
  • Easter eggs and chocolate flakes for decoration
Black Forest cake decorated with Easter Eggs

Ingredients

Chocolate cake:

  • 1 cup plain flour
  • 1/2 cup cocoa powder
  • 1 cup caster sugar
  • 1 tsp baking powder
  • 1 tsp salt
  • 1 tsp espresso powder
  • 60g butter, melted
  • 1/2 cup milk
  • 1 large egg
  • 1 tsp vanilla paste
  • 1/2 cup boiling water

Cherry topping:

  • 300g cherries, pitted
  • 100g caster sugar
  • 1 sheet gelatin
  • 60ml brandy

Chantilly cream:

  • 300ml cream
  • 1 cup pure icing sugar
  • 1 tsp vanilla paste

Decorations:

  • 3 medium sized chocolate Easter eggs
  • Easter quail egg chocolates
  • Chocolate flakes

Instructions

Chocolate cake:

  1. preheat oven to 160C and grease cake tins
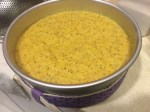
  2. sift together the dry ingredients into a bowl
  3. add the butter, milk, egg, vanilla and mix on medium speed until well combined
  4. slowly add the boiling water while mixing on low speed
  5. distribute the batter into two 6inch cake tins
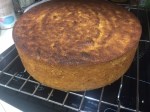
  6. bake for 20-25mins

Cherry sauce:

  1. puree cherries in a food processor or with a stick blender
  2. place cherries and sugar in a pot over medium heat until simmering. Allow to simmer for 10mins until the liquid has thickened
  3. remove from heat and add the bloomed gelatin sheet
  4. stir in the brandy and set aside to cool

Chantilly cream:

  1. whisk together the cream, sugar and vanilla until stiff peaks form
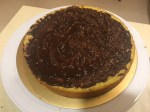
To assemble:

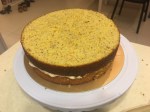
  1. cut the chocolate cakes in half so we now have four discs
  2. place the first disc onto a cake board and brush with a light coat of brandy
  3. pipe a circle of Chantilly cream around the edges of the cake
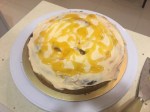
  4. now fill the insides of that circle with cherry sauce
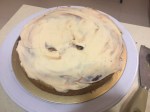
  5. coat with a thin layer of Chantilly cream
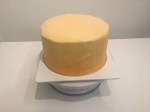
  6. repeat with the remaining layers of the cake then coat the entire cake with the remaining Chantilly cream
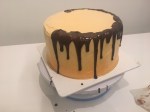
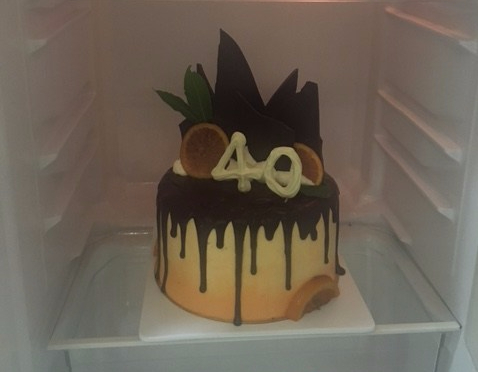
  7. decorate with the chocolate flakes and Easter eggs
pipe a circle of Chantilly cream around the edge of the cake
fill with cherry sauce
Coat the black forest cake with the remaining Chantilly cream

IMG_2282

Balck Forest Easter cake
Decorate the Black Forest cake with Easter Eggs


Instagram: Whatever_It_Bakes

Christmas Baking: Gingerbread city

Gingerbread city

Makes: A2 sized gingerbread model

Time required: 15-20 hours in total

Difficulty: ★★★★☆

Inspiration:

Having made my first gingerbread house last year (recipe in this post) I wanted to make something bigger and more complex this year. That’s where my Civil Engineering degree comes in handy – it was my childhood dream to build skyscrapers. I decided to take inspiration from some of the cities I’ve travelled to this year – Hong Kong (now home … I made this my centerpiece), Melbourne (old/second home), Tokyo, Shanghai, Macau, London and Singapore. I also wanted to include Boracay, Seoul and Kunming but didn’t want to over complicate the gingerbread model.

Components of the gingerbread city:

  • Hong Kong: Bank of China Tower, The Centre
  • Melbourne: Eureka Tower, Melbourne Central Office Tower, Melbourne Cricket Ground
  • London: Tower Bridge, London Eye (or it could have been a Ferris wheel from any city …)
  • Tokyo: Pagoda of Sensoji – it was meant to be five stories but I kept it to three so it didn’t outshine the Bank of China Tower
  • Singapore: Marina Bay Sands … although several people mistook this for the Stonehenge 😦
  • Shanghai: Oriental Pearl Tower
  • Macau: The Ruins of St Paul’s

Recipe:

I used the same recipe as last year, although required two batches of gingerbread and two batches of icing to make all the components for the gingercity

Finished Gingercity:

Gingerbread city - all the gingerbread pieces
Gingerbread city – all the gingerbread pieces
Gingerbread city - starting to put together the landmarks
Gingerbread city – starting to put together the landmarks
Gingerbread city - Deciding how to arrange the city
Gingerbread city – Deciding how to arrange the city
Gingerbread city
Completed Gingerbread city


Instagram: Whatever_It_Bakes

Cake decorating: Boat-shaped cake

Completed boat cake

Makes: 3 x 8inch squares which are constructed into 1 boat

Time required: 3 hours

Difficulty: ★★☆☆☆

Recipe:

Using orange cake recipe, but this can be made from any type of cake

Constructing the boat:

  1. Layer one square on top of another and cut two opposite edges at a slight angle
  2. with the remaining square, cut out two triangles for the front of the boat to form the boat shape below
Cutting the square cakes into boat shape

3. use the leftovers of that third square to build the top of the boat

boat cake construction
Icing the boat cake
boat cake 2
Almost finished …
Completed boat cake
Completed boat cake


Instagram: Whatever_It_Bakes

Recipe: Lime Coconut Mousse

Nutting to see here - loving my squirrel bookend

Makes: 1 dome/half-sphere (~8inch in diameter)

Time required: 3 hours in total over 4 sessions

Difficulty: ★★★☆☆

Inspiration:

Reading through Olivier Dupon’s book “The New Patissiers” (my current favourite book) I came across one page which had a really interesting flavour combination – it was a recipe for a chocolate mousse entremet with a lime panna cotta, coconut dacqouise … coated in milk chocolate mousse. I wanted to give the elements of this recipe a try, liking the idea of the tangy-ness of the lime mixed with creaminess of the coconut and the sweetness of the chocolate.

Elements of this cake from centre to outside:

  • lime panna cotta
  • coconut cream
  • dark chocolate mousse
  • coconut dacquoise base
  • coated in dark chocolate velvet spray

Although every element of this cake is very easy and quick to make, it does require preparation to make and freeze each of the layers before moving onto the next

Ingredients:

Lime panna cotta:

  • juice of 2 limes
  • 90ml milk
  • 90ml cream
  • 45g caster sugar
  • 2 gelatin sheets

Coconut mousse:

  • 100ml coconut milk
  • 150ml milk
  • 150ml cream, whipped
  • 1 sheet gelatin

Coconut Dacqouise:

  • 3 egg whites
  • 60g caster sugar
  • 30g coconut flakes
  • 30g almond meal
  • 60g pure icing sugar

Dark Chocolate Mousse:

  • 94g caster sugar
  • 94ml water
  • 1 egg
  • 3 egg yolks
  • 150ml cream
  • 3 gelatin sheets
  • 250g dark chocolate
  • 300ml cream, whipped

Chocolate Velvet spray (I used a pre-made can)

Lime coconut mousse cake 4
Plastic moulds I used to create the dome shape

Instructions:

Lime Panna Cotta:

  1. bring lime, cream and sugar to simmer for 10 minutes
  2. remove from heat and mix in gelatin
  3. pour into dome mould (~3inch in diameter) and freeze for several hours or overnight

Coconut Mousse:

  1. bring coconut milk and milk to simmer
  2. remove from heat and stir in the gelatin
  3. once cool, gently fold in the whipped cream
  4.  pour into a dome mould (~3.5inch in diameter) and then push the lime panna cotta dome into the centre
  5. place into the freezer for several hours or overnight

Coconut Dacquoise:

  1. preheat oven to 180C and line a 8inch baking tin with baking paper
  2. sift together coconut flakes, almond meal and icing sugar
  3. in a separate bowl, whisk the egg whites and caster sugar to firm peaks
  4. gently fold the dry ingredients into the meringue
  5. spread onto baking tin and bake for 15-20mins

Dark Chocolate Mousse:

  1. whisk water, sugar, eggs and egg yolks together in a bain-marie
  2. remove form heat and continue to whisk until airy
  3. in a separate pot, bring cream (150ml portion) to boil and stir in the gelatin
  4. pour hot cream over chocolate and stir to combine
  5. gently fold the chocolate mixture into the egg mixture
  6. whisk the 300ml portion of cream, then gently fold into the chocolate/egg mixture
  7. pour the mousse into the 8inch dome to around two-thirds full and drop the panna cotta/coconut mousse into the centre
  8. fill the rest of the dome to almost to top, leaving a little space to place the coconut dacquoise on top
  9. place in freezer for several hours or overnight until the dome is frozen

Chocolate velvet coating:

  1. once the dome is frozen, unmould and coat the cake in a chocolate velvet spray
chocolate mousse dome
Lime coconut mousse cake 2
pre-made chocolate velvet spray
All finished and ready to eat
Lime coconut mousse cake
Nutting to see here – loving my squirrel bookend


Instagram: Whatever_It_Bakes

Recipe: Unicorn cupcakes

Makes: 20 cupcakes

Time required: 2 hours + 2 hours for unicorn decorations

Difficulty: ★★☆☆☆

Inspiration:

Very excited to have baked my first cupcakes in Hong Kong, which was an order of 20 unicorn themed cupcakes for a 4th birthday party. As someone who has barely worked with fondant in the past … and especially not during the Hong Kong summer where the humidity impacts the texture of fondant, one of the challenges for these cupcakes was figuring out how to make the unicorn horns.

Elements I settled on for the cupcakes:

  • vanilla cupcakes with raspberries and white chocolate chips
  • cream cheese frosting – I chose light pink, bright pink, turquoise and purple as my unicorn colours … later also realising that the turquoise and purple I used are the same colours as Sully from Monsters Inc.
  • Marzipan and  pocky sticks for the horns and ears. I chose marzipan over fondant for the horns and ears as it seems to hold up better in the Hong Kong humidity. I also used pocky sticks over toothpicks to hold together the horns – baking for a kids party I wanted to make sure everything within the cupcake was edible

Ingredients:

Cupcakes:

  • 200g butter
  • 200g caster sugar
  • 3 eggs
  • 2 tsp vanilla bean paste
  • 300g all purpose flour
  • 3 tsp baking powder
  • 1 tsp salt
  • 300 ml milk
  • 30g white chocolate chips
  • 50g raspberries

Cream Cheese Frosting:

  • 500g cream cheese
  • 200g butter
  • 300g icing sugar
  • 1 tsp vanilla bean paste
  • 1 tsp lemon

Unicorn decorations:

  • 200g marzipan
  • edible gold spray paint
  • 1 pack pocky sticks
  • pink/pearl sprinkles

Instructions:

Cupcakes:

  1. preheat oven to 190C (170C fan forced)
  2. beat butter until smooth
  3. add sugar and beat until light and fluffy
  4. mix in the eggs one at a time and vanilla
  5. add in the sifted flour mix (flour, baking powder, salt) and milk alternatively (around a third at a time) and mix until just combined
  6. spoon the mixture into lined muffin tins with the cups around 2/3 full
  7. top with raspberry pieces and white chocolate chips
  8. bake for 20 minutes until golden and let cool before frosting
Cupcake ingredients
Cupcake ingredients
Cupcake batter with raspberry and white chocolate chips

Cream Cheese Frosting:

  1. beat cream cheese and butter until smooth
  2. slowly beat in the sugar until light and fluffy
  3. mix in the vanilla and lemon
  4. divide the frosting into several batches (uneven in volume) and colour each batch a different colour. I chose light pink, bright pink, turquoise and purple

Unicorn horns and ears:

  1. cut the pocky sticks ~3cm in length (depending how tall you want the unicorn horns)
  2. take a small amount of fondant and roll it into a cone shape over the pocky, leaving ~1cm of the pocky stick hanging out the bottom which you will later use to poke into the cupcake. To create the ‘horn’ look, gently run a toothpick spiral around the marzipan cone
  3. spray over the horns with edible gold dust
  4. for the ears: roll out the fondant and roughly cut small triangles
  5. take two corners of the triangle and press them together to create the ears

Edible gold spray for the unicorn horns

Decorating:

  1. place each colour of the cream cheese frosting into a separate piping bag fitted with different sized star tips
  2. pipe one colour of frosting at a time onto the cupcakes. I started with the light pink frosting as I wanted light pink to be the dominant colour
  3. finish the cupcakes by placing on the horns and ears. I also added pink and pearl sprinkles to add more texture and sparkle
piping the unicorn one colour at a time
finished piping the unicorn hair
Topped with the unicorn horn and ears
Unicorn cupcakes
Unicorn cupcakes
Unicorn cupcakes ready for instragram
Unicorn cupcakes packed and ready to go for the birthday party


Instagram: Whatever_It_Bakes

Recipe: Crepe Cake

My instragrammed crepe cake

Makes: 8 inch cake (24 layers)

Time required: 3 hours

Difficulty: ★★★☆☆

Inspiration:

Having never made crepes or pancakes before (well … not cooking much in a pan at all), I was keen to try making a crepe cake. I’ve always loved the crepe cakes from the famous Lady M – stopping by the Lady M boutique on 40th street each time I’ve visited New York and I still remember how excited I was to stumble across a Lady M on a trip to Singapore where I got to introduce my sister (who is a huge fan of matcha) to the matcha crepe cake.

Initially, given it was my first time making crepes I wanted to keep the cake simple – like the Lady M ones – by just making it layers of crepe and cream. However, after exploring the nearby wet market in Hong Kong for fresh fruits I came home with a bunch of passionfruit and decided to incorporate those into the cake. I ended up with a crepe cake layered with passionfruit custard and chocolate ganache – as you could probably guess from my previous posts (passionfruit & chocolate eclairs, passionfruit & chocolate tart …) it is one of my favourite flavour combinations!

Elements of this cake:

  • 24 crepes (~8 inch in diameter)
  •  passionfruit custard
  • chocolate ganache
The Famous Lady M crepe cakes in New York

Ingredients:

Crepes (makes ~24 depending on the size of your pan)

  • 600ml whole milk
  • 1tsbp vanilla paste
  • 2tsbp brandy
  • 5 egg yolks
  • 50g caster sugar
  • 90g butter
  • 300g all purpose flour

Passionfruit Custard:

  • 700ml whole milk
  • 3 eggs
  • 3 egg yolks
  • 200g caster sugar
  • 65g cornstarch
  • 1tsbp vanilla
  • 85g butter
  • 4 passionfruits, seeds removed

Chocolate Ganache:

  • 100g dark chocolate
  • 100ml cream


Instructions:

I’d recommend making the custard first, so it has time to cool in the fridge while you’re frying the crepes

Crepes:

  1. place all the ingredients except flour into a blender and blend on med speed
  2. add in the flour and blend again until well combined
  3. refrigerate for 2 hours (or overnight)
  4. lightly spray or grease a small pan (~8inch in diameter) and fry the crepe batter on medium heat. I used around 1/4 cup of batter for each crepe
  5. allow the crepes to cool by spreading on parchment paper while making the rest of the crepes
My first time frying crepes

Passionfruit custard:

  1. place the whole eggs, egg yolks and cornstarch with 20g of the sugar in a bowl and whisk until smooth
  2. in a large saucepan, combine milk, remaining sugar and vanilla and bring to a boil
  3. remove from the heat and slowly pour in half the hot milk into the egg mixture while whisking to avoid cooking the eggs
  4. pour the milk and egg mixture back into the pot and heat until the mixture lightly bubbles
  5. remove from heat and stir in the passionfruit and butter
  6. pour the custard through a fine mesh and plastic wrap with the plastic touching the surface of the custard and store in the fridge to cool

Chocolate Ganache:

  1. bring cream to boil
  2. poor over chocolate and set aside for 2 mins. Stir together the melted chocolate and cream

Assembling the crepe cake:

  1. take one crepe and place it on a 8 inch cake board
  2. spread a thin layer of chocolate ganache over the crepe
  3. follow with a thin layer of passionfruit custard
  4. place the next crepe over the top and repeat until all the crepes are used up

You could also trim the edges of the crepes to a 8inch cake tin if you want cleaner edges, however I preferred the natural rough edges on my cake. I also coated the top of the cake in sugar and torched it for a bruleed finish

Thin layer of chocolate ganache
thin layer of passionfruit custard
repeat until all layers of crepes have been assembled
IMG_8184
torching the crepe cake
IMG_8202
experimenting with decorating the crepe cake
IMG_8278
My instragrammed crepe cake


Instagram: Whatever_It_Bakes

Recipe: Mango Mousse Cheesecake Entremet

Mango mousse & vanilla cheesecake entremet on a crunchy caramel cookie

Makes: 12 mini dome cakes (6cm in diameter)

Time required: 3 hours in total, over 2 nights

Difficulty: ★★☆☆☆

Inspiration:

Inspired by another one of my favourite chocolates – the Mango & Vanilla chocolate from Koko Black back home in Melbourne. Every time I used to visit Koko Black I would buy at least five of these Mango & Vanilla chocolates in addition to several of the Passion flavour (I have also baked a cake inspired by this chocolate with recipe here!) and then try a range of other truffles and chocolates.

img_3460
Trying all the chocolates from Koko Black and Xocolatl in Melbourne

The elements of this cake include:

  • Vanilla cheesecake centre
  • Runny mango jam
  • Mango mousse dome
  • Mango mirror glaze
  • caramel biscuit base

Ingredients:

Vanilla Cheesecake centre:

  • 225g cream cheese
  • 200g caster sugar
  • 1 egg
  • 100ml thickened cream
  • 1 tsp vanilla
  • 1/2 lemon

Caramel Biscuit base:

  • 1 pack caramel flavoured biscuits (can use other flavours, e.g. Arnott’s Nice biscuits are a good alternative)
  • 150g melted butter

Mango jam:

  • 200g mango puree
  • 200g caster sugar
  • 2 gelatin leaves

Mango Mousse:

  • 200g mango puree
  • 250ml cream, whipped
  • 200g sugar
  • 3 gelatin leaves

Mango glaze:

  • 200g mango puree
  • 200g sugar
  • 4 gelatin leaves
  • 200ml condensed milk
  • 150g white chocolate

Instructions:

Vanilla Cheesecake centre:

  1. Preheat over at 150C
  2. beat the cream cheese with sugar until smooth
  3. whisk in the egg until well combined
  4. fold in cream, vanilla and lemon until just combined
  5. pour into a 8 x 8 inch square tin (or any other baking tin of similar size)
  6. bake for 20 minutes
  7. once cool, cut out 12 circles, around 2-3cm in diameter

Caramel Biscuit base:

  1. blend the biscuits in a food processor until there are not big lumps
  2. stir in melted butter
  3. spread over a large flat tin (ensure this is spread evenly enough to be able to cut out 12 x 6cm circles for the cake base) and bake at 150C for 10mins
  4. while still warm, cut out the 12 circles and set aside to cool. The 12 circles will be used as the base of the mousse dome, however do not discard the rest of the cookie base as this can be used to decorate the dome

Mango jam:

  1. heat mango puree and sugar over low heat until the sugar dissolves and the mixture thickens
  2. while the mixture is still hot, stir in bloomed gelatin and set aside
  3. once cool, place the mixture into a piping bag

Mango Mousse:

  1. heat mango puree and sugar over low heat until the sugar dissolves and the mixture thickens
  2. stir in gelatin and set aside to cool
  3. once the mixture is at room temperature, fold in the whipped cream to form the mousse

To Assemble:

  1. gather 12 circle dome moulds, each around 6cm in diameter
  2. fill half of each dome with the mango mousse mixture
  3. carefully pipe around 2 teaspoons of the mango jam on top of the mango mousse (be gentle as we don’t want to jam to sink to the bottom of the mould)
  4. push a piece of vanilla cheesecake into each of the domes on top of the mango jam. We want to push the cheesecake in just far enough that the edges of the cheesecake are surrounded by mango mousse. Add a bit more mousse into the dome if needed
  5. lastly, place a disc of the caramel biscuit onto each of the domes, sitting the biscuit base on top of the mousse
  6. set aside in the freeze for at least 3 hours, preferably overnight to harden

Glazing the cake:

Mango glaze: (make this the following day once the mousse domes are frozen)

  1. un-mould each of the mousse domes and place back in the freezer
  2. place mango and sugar over medium heat until the mixture thickens
  3. remove from heat and add the bloomed gelatin
  4. stir in the condensed milk
  5. while still hot, pour over white chocolate and stir to melt and incorporate the chocolate
  6. when the glaze cools to 35 degrees, pour over the mango mousse domes
  7. crumble the off-cuts from the caramel cookie base and coat around the base of each of the cakes
Mango mousse & vanilla cheesecake entremet on a crunchy caramel cookie


Instagram: Whatever_It_Bakes

Recipe: Chocolate Orange Drip Cake

Makes: 8 inch cake (4 layers)

Time required: 5 hours in total, over 2 nights

Difficulty: ★★★☆☆

Inspiration:

Scrolling through my Instragram feed, I’m constantly drooling over posts of drip cakes so I was very keen to try making one for a birthday party I attended last weekend. Flavour-wise: I decided on a chocolate-orange combination – most people either love or hate the chocolate & orange flavours together. However, having previously baked a chocolate & orange entremet which friends raved about and providing choc-orange macarons as wedding favours (which none of the 150 guests complained about) … I’ve concluded that most people love it.

The components of this cake:

  • four layers of orange flourless cake (gluten free and relatively healthy?),
  • held together with cream cheese frosting, orange jam, chocolate ganache,
  • coated in a thicker layer of the cream cheese frosting,
  • covered in dripping chocolate
  • topped with candied orange decorations and chocolate shards
Orange mousse & chocolate fudge entremet
Orange mousse & chocolate fudge entremet – cake I’d previously made which was inspired by Messina’s fudging delicious flavour

Ingredients:

Orange Flourless Cake:

  • 10g melted butter to grease
  • 5 oranges
  • 7 eggs
  • 150g caster sugar
  • 600g almond meal
  • 2 tsp baking powder

Cream Cheese Frosting:

  • 750g cream cheese
  • 200g butter
  • 300g cups icing sugar
  • 1tsp vanilla bean paste
  • 3 drops orange food colouring (optional)
  • 60ml Cointreau (optional)

Orange Jam:

  • 3 oranges
  • 200g caster sugar

Chocolate Ganache:

  • 150g dark chocolate
  • 150ml cream

Candied Orange:

  • 1 orange
  • 1.5 cup water
  • 200g caster sugar

Chocolate Drip:

  • 150g dark chocolate
  • 200g butter

Chocolate Shards:

  • 200g dark chocolate

Instructions:

Orange Flourless Cake:

  1. preheat oven to 170 degrees celcius, grease 2x 8 inch pans with melted butter
  2. in a large pot, bring oranges to boil
  3. continue to cook for 15 minutes, drain and repeat. Drain again and place the oranges in cold water
  4. place oranges in a food processor until smooth
  5. In a separate bowl, whisk eggs and sugar until thick and pale
  6. fold in the orange, almond meal and baking powder until just combined
  7. evenly distribute the cake mixture into the two 8 inch pans
  8. bake for 50mins, then set aside for 15mins to cool before removing from the pan

Cream Cheese Frosting:

  1. beat cream cheese with butter until soft
  2. whisk in icing sugar, 50g at a time and whisk until light and fluffy
  3. add in vanilla, cointreau and orange food colouring and whisk once more to combine. if you would like to make an ombre effect with the orange frosting, split the frosting into several batches and add different amounts of orange colouring to each

Orange Jam:

  1. Juice the oranges and place in small pot with sugar over low-med heat
  2. continue stirring for 10-15mins until the sugar dissolves and the syrup thickens
  3. set aside to cool

Chocolate Ganache:

  1. bring cream to boil then pour over chocolate
  2. set aside for 2 mins for the chocolate to soften, and then stir to combine

Candied Orange:

  1. thoroughly wash oranges to get rid of any waxy residue
  2. cut the orange into 1/4 inch slices
  3. heat water and sugar in a pot until the sugar dissolves
  4. bring to a gentle boil and add the orange slices
  5. after 15min, flip the slices and continue to cook on low-med heat for another 15mins until the peel becomes translucent and the syrup has thickend
  6. place the oranges on a wire rack on top of a lined baking sheet to cool

Chocolate drip:

  1. melt chocolate over a double boiler
  2. remove from heat and stir in butter to melt
  3. set aside for 10mins before the chocolate drip is the right consistency to use on the cake

Chocolate shards:

  1. temper chocolate over a double boiler
  2. spread thin layer of the melted chocolate over acetate sheet and set aside to cool and harden
  3. once the chocolate has set, break into rough triangular shards for decorations

Assembling the cake:

  1. cut the two 8inch cakes into two discs to make four cake layers
  2. place the first cake layer on a 9inch cake board
  3. spread a thin layer of chocolate ganache over the cake
  4. gently cover the ganache in a layer of cream cheese frosting
  5. drizzle a small amount of the orange jam over the cream cheese layer
  6. top with next cake layer
  7. repeat steps 3-6 for each of the cake layers
  8. once the cake has formed its shape, spread a thin layer of cream cheese frosting over the cake as a crumb coat
  9. then apply a thicker layer of cream cheese frosting and smooth over the cake
  10. set aside in the fridge (preferably overnight) to cool
  11. remove the cake from the fridge. Using a spoon, top the cake with the chocolate drip by carefully drizzling a small spoonful of ganache at a time to the edge of the cake. Slightly rotate the cake and repeat until all the top edges of the cake are covered in the chocolate drip
  12. pour the rest of the chocolate drip onto the top of the cake

The most exciting part is of course decorating the cake. I opted for chocolate shards, candied orange and bay leaves, using the leftover cream cheese frosting to hold the decorations together.

Chocolate Orange Flourless drip cake with chocolate shards
Chocolate Orange drip cake decoration with chocolate shards

I got a little carried away with the chocolate shards and had to remove a few shelves from the fridge to fit the cake

Finished chocolate orange flourless drip cake with a number 40 to celebrate a birthday
Finished cake with a number 40 to celebrate a birthday


Instagram: Whatever_It_Bakes

Recipe: Passionfruit & Meringue Eclairs

passionfruit chocolate meringue eclair recipe

Makes: 15 eclairs

Time required: 2 hours

Difficulty: ★★☆☆☆

Inspiration:

Since moving to Hong Kong in February this year, I have been baking using a portable oven (besides my trips back to Melbourne). For those of you who haven’t lived in Hong Kong before … the apartments are small and most apartments have tiny kitchens without ovens. Although this portable oven (around the size of an Australian microwave) is great for cooking and basic cakes, the temperature isn’t very even or reliable so I haven’t been brave enough to try baking macarons in Hong Kong. But I am dying to bake some sort of pastry … so I decided to try a choux pastry!

My favourite eclairs are the salted caramel ones from Chez Dre in Melbourne and the world-famous eclairs from Sadaharu Aoki in Tokyo. Having no prior concept of what makes choux pastry puff, I’ve always marvelled at how patisseries manage to fill the eclair with custard without cutting the eclair open. Turns out it’s quite simple! 🙂

img_0848
My portable oven in Hong Kong – great for basic baking but I haven’t been brave enough to test macarons in this

Ingredients:

Passionfruit custard:

  • 200g passionfruit, seeds removed
  • 350ml milk
  • 2tsp vanilla been paste
  • 4 egg yolks
  • 100g caster sugar
  • 50g cornstarch
  • 20g unsalted butter

Choux pastry:

  • 125g bread flour, sifted
  • 100ml milk
  • 100ml water
  • 10g sugar
  • 1tsp salt
  • 100g unsalted butter
  • 4 eggs

Chocolate ganache:

  • 200g chocolate
  • 150ml cream

Meringue:

  • 2 egg whites
  • 180g caster sugar
  • 65ml water

Instructions:

Passionfruit custard:

  1. whisk sugar and egg yolks until pale.
  2. whisk in the cornstarch
  3. heat milk and passionfruit over low-med heat until simmering
  4. pour 1/3 of the milk/passionfruit into the egg yolk mixture whilst whisking, then pour the entire mixture back into the rest of the milk/passionfruit
  5. place back on low heat, stirring constantly until the custard thickens
  6. remove from heat and stir in the vanilla paste and butter
  7. cover in glad wrap with the glad wrap touching the surface and set aside to chill in the fridge while making the eclair shells

Choux pastry

  1. Preheat oven to 200°C
  2. Place the water, milk, butter, sugar and salt into a saucepan over low heat
  3. Once the mixture just comes to a boil, take off the heat, pour in all the flour and mix thoroughly with a wooden spoon (it should now look like mashed potato)
  4. Place the mixture back on low heat and continue to mix for another 2-3mins until the dough forms a ball and comes away from the sides of the pan
  5. Pour the dough into a bowl and mix with wooden spoon to cool slightly before adding the eggs
  6. Add the eggs one at a time and ensure each egg is well incorporated before adding the next egg. This allows greater control over the amount of egg to ensure the mixture doesn’t become too runny from too much egg
  7. The mixture is ready when you lift the wooden spoon and the dough slowly falls off the spoon
  8. Place dough into a piping bag fitted with a 1cm star nozzle lines around 10-12cm long. Be sure to leave enough space between for the eclairs to expand in the oven
  9. Bake for 10mins at 200°C and then reduce the temperature to 180°C and bake for another 20mins
  10. once removed from the oven, use a toothpick to poke a whole through each meringue to let the steam out. This prevents the eclair shell from becoming soggy or sinking
  11. set aside to completely cool before adding in the custard
img_2834
Piped choux pastry ready to go into the oven
img_2835
Choux pastry puffing up in the oven

Chocolate ganache:

  1. Bring cream to boil and pour over dark chocolate. Set aside for 2 minutes
  2. Mix in the melted chocolate with the cream
  3. stir in the butter, and set aside to cool slightly

Assembling the eclairs:

  1. once the shells have completely cooled, poked three holes evenly spaced along the top of the eclair
  2. place the custard into a piping bag fitted with a long narrow tip and fill each eclair with custard through the three holes
  3. coat the top of the eclair in chocolate ganache using a spatula

Many blogs tell you to poke the holes and fill the eclairs from the botton of the eclair shell however I prefer to pipe it through the top so I can cover up the holes with ganache.

img_2844
Eclairs coated in chocolate ganache

Meringue:

  1. whisk egg whites until foamy
  2. heat sugar and water over low-med heat until the syrup reaches 120ºC
  3. while whisking the eggs, pour the sugar syrup in a thin stream down the side of the whisking bowl
  4. continue to whisk the eggs until it form stiff peaks
  5. place the meringue into a piping bag fitted with a petal tip and pipe the meringue onto the eclairs. you could also use other piping tips to create other patterns
OLYMPUS DIGITAL CAMERA
Carefully piping the meringue onto the eclairs
img_2843
nom nom … all that delicious meringue
OLYMPUS DIGITAL CAMERA
torching the meringue

To finish … torch the meringue and decorate the eclairs with raspberries and mint leaves 🙂

OLYMPUS DIGITAL CAMERA
Finished eclairs!! Photo: IG __Salpal__
OLYMPUS DIGITAL CAMERA
ready to be eaten … so delicious :p … Photo: IG __Salpal__


Instagram: Whatever_It_Bakes