Makes: 1 dome/half-sphere (~8inch in diameter)
Time required: 3 hours in total over 4 sessions
Difficulty: ★★★☆☆
Inspiration:
Reading through Olivier Dupon’s book “The New Patissiers” (my current favourite book) I came across one page which had a really interesting flavour combination – it was a recipe for a chocolate mousse entremet with a lime panna cotta, coconut dacqouise … coated in milk chocolate mousse. I wanted to give the elements of this recipe a try, liking the idea of the tangy-ness of the lime mixed with creaminess of the coconut and the sweetness of the chocolate.
Elements of this cake from centre to outside:
- lime panna cotta
- coconut cream
- dark chocolate mousse
- coconut dacquoise base
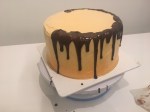
- coated in dark chocolate velvet spray
Although every element of this cake is very easy and quick to make, it does require preparation to make and freeze each of the layers before moving onto the next
Ingredients:
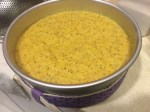
Lime panna cotta:
- juice of 2 limes
- 90ml milk
- 90ml cream
- 45g caster sugar
- 2 gelatin sheets
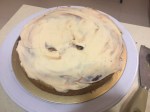
Coconut mousse:
- 100ml coconut milk
- 150ml milk
- 150ml cream, whipped
- 1 sheet gelatin
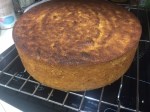
Coconut Dacqouise:
- 3 egg whites
- 60g caster sugar
- 30g coconut flakes
- 30g almond meal
- 60g pure icing sugar
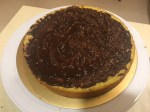
Dark Chocolate Mousse:
- 94g caster sugar
- 94ml water
- 1 egg
- 3 egg yolks
- 150ml cream
- 3 gelatin sheets
- 250g dark chocolate
- 300ml cream, whipped
Chocolate Velvet spray (I used a pre-made can)

Instructions:
Lime Panna Cotta:
- bring lime, cream and sugar to simmer for 10 minutes
- remove from heat and mix in gelatin
- pour into dome mould (~3inch in diameter) and freeze for several hours or overnight
Coconut Mousse:
- bring coconut milk and milk to simmer
- remove from heat and stir in the gelatin
- once cool, gently fold in the whipped cream
- pour into a dome mould (~3.5inch in diameter) and then push the lime panna cotta dome into the centre
- place into the freezer for several hours or overnight
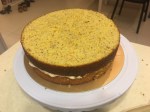
Coconut Dacquoise:
- preheat oven to 180C and line a 8inch baking tin with baking paper
- sift together coconut flakes, almond meal and icing sugar
- in a separate bowl, whisk the egg whites and caster sugar to firm peaks
- gently fold the dry ingredients into the meringue
- spread onto baking tin and bake for 15-20mins
Dark Chocolate Mousse:
- whisk water, sugar, eggs and egg yolks together in a bain-marie
- remove form heat and continue to whisk until airy
- in a separate pot, bring cream (150ml portion) to boil and stir in the gelatin
- pour hot cream over chocolate and stir to combine
- gently fold the chocolate mixture into the egg mixture
- whisk the 300ml portion of cream, then gently fold into the chocolate/egg mixture
- pour the mousse into the 8inch dome to around two-thirds full and drop the panna cotta/coconut mousse into the centre
- fill the rest of the dome to almost to top, leaving a little space to place the coconut dacquoise on top
- place in freezer for several hours or overnight until the dome is frozen
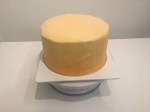
Chocolate velvet coating:
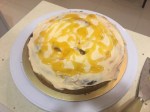
- once the dome is frozen, unmould and coat the cake in a chocolate velvet spray


Instagram: Whatever_It_Bakes